Wednesday, December 4, 2013

New Toy: Brother DreamMaker Review

Crafting is expensive (especially in Aus!), and crafting toys even more so.

Finally got my hands on a Brother DreamMaker a.k.a. Innovis XE VE2200. Just released in Aus in October. So slow, about a year after USA/UK :X

This is my first embroidery machine.
I was originally considering the low-end Brother NV780D as a starter machine but i was totally sold on all the bells and whistles the DreamMaker came with.
I mean, what would i do with the starter machine when i was ready to move up? Or what if the lower machine, with its lack of features, destroys my dream of a great embroidery machine putting me off it forever? lol
But most importantly, the DreamMaker has a large large embroidery area! 18cm x 30cm! This was my first priority. Size matters!

The specs of the machine can be found on the internets so lets get to the all important embroidery.

I chose a practical built in design as the first run.
7 thread changes and 30 mins of stitching - fairly large piece for a starter (crazy!).

The design shown in the booklet.
The piece was embroidered on sheer silk organza with a washaway stabiliser.
The final result still in the large hoop:

 With flash:
It looks great from a distance but if you're pendantic or you pay particular attention to the fine details, its not perfect.
Close up of the top:
The top scallop shape doesnt quite meet the right border line nicely on the right side. It is slightly shifted abit far right. Whereas the scallop meets the left border perfectly.
Close up of the left bottom:
The original design in the booklet shows that there should be a small thin dashed line down the left side, however the machine starts off with the dash at the base but it stitches over that space as it moves up the design.
 The very neat back of the embroidery:
Close up of top corner:
There looks to be a small aneurysm of pink thread on the top of the butterfly wing, dont know what happened there - the front is not affected but there is a blob of thread.
The final product - all stitched up with a light cream cotton liner (as the back of the embroidery is quite hard and abit scratchy).
Do you know what it is yet? :P

Its a soft glasses case... for times when you really dont want to carry the ginormous hard case the sunnies come with.

Overall, a great machine. Not perfect, but cant expect it to be, its still excellent and im still in awe of it. :P
Its fairly quiet for a sewing machine, and its so easy to use.
Even when the thread broke twice (first time, i was careless in threading the top thread when i was changing colours and second time, the machine shredded the thread), it was very easy to resume where it stopped without any indication that anything went wrong.
The shredded thread!
That was my biggest fear - not being able to resume the embroidery properly and ruin the piece, or it obvious was joined somewhere!

Also, something totally superfluous and not important, its makes japanese sounds (reminds me of the tones used in the different japanese trains) whenever it wants attention. Totally cute... as cute as a machine can possibly be.


i have big dreams for this machine lol lets hope it lives up to its name!

Monday, September 23, 2013

More Clutching Maddness

In keeping with the box clutch maddness, and buoyed by the relative success of the grapefruit box clutch, i was itching to get cracking on another one (to take a break from studying for a certification).

Not anything original (Charlotte Olympia has done it, Chanel has done it, Lanvin has done it...) but is a cute and ladylike accompaniment to any outfit. It is the Perfume Bottle clutch.

Here is a sketch of what i wanted to it resemble. Proportions are abit off.
I wanted to go for something a little bit vintage/art deco.

and here is the end result..

The main body of the 'bottle' is covered in champagne coloured silk twill. The front and back panels are padded with some thin wadding. The bottle 'top' is covered in white cotton with a dainty floral print.
The name plaque is also padded and is hand embroidered in metallic gold and gray thread.


It is roomier than the grapefruit as i added an extra half cm to the thickness of the clutch. The deco style 'bottle' top was certainly a challenge to make. It ended up being abit more well 'rounded' than the sharp deco corners i originally envisioned.

A peek inside...

the vintage blue posies seen previously (keeping in with the vintage feel of the clutch)

Tuesday, September 10, 2013

Wednesday, July 31, 2013

When life gives you lemons...

... put them aside and get some grapefruits!

Getting into the small clutch trend, i put my cartonnage skills to the test and decided to make a citrus box clutch. Not a whole citrus, just one slice :-)
The major problem i faced with this project was how to do the closure/clasp.
I have seen alot of other solutions crafters have used to make a closure - such as a ribbon or elastic loop over a button, or ribbon ties; but that didnt take my fancy as i didnt want straingy bits or protuding bits.
As a two bit crafter, i had no access to custom clasps that you see on commercially produced box clutches. I put the brain to work to come up with a solution with ready made components.

The project took alot longer than anticipated as i had to wait for extra thin magnetic snaps to fly over (from Etsy), as the selection of available craft components seriously sucks here in Sydney stores. Sad.

Very proud of this box clutch. Very happy with how it turned out, although there were minor issues.
This little grapefruit is ready for breakfast!

Marquise crystal beads as seeds.
Hand stitched name in metallic silver thread on the backside.
stitched sides
Mirror, mirror in the clutch, is this all abit too much?
Surprise contrasting 'Balloon Tots' lining - all facing in all different directions ^.^;

Tuesday, July 16, 2013

Something Blue...

So i picked up this small floral vintage print cotton fabric on clearance a few weeks back.
I only bought 2 metres, and it was just enough to make this pair of ankle length pants... because you know... most pants available in stores are boring.

The base trouser pattern comes from Burda Style issue 08/2010.
My current fav. pant pattern.
Slim leg and not tightly fitted, and has pockets!

At the last moment, i decided to add a small pleated peplum in sheer silk organza - cute o^.^v
A few year back, i made a pair of fitted pants with a small ruffled peplum with great success (and many double takes from passers-by), so i thought i'd make an updated version.

Upon seeing the complete pant, words that come to mind are "vintage" and "wedding/bridal"..   hmmm....


front

back with a loose butt! not so loose when its actually on.
pants never photgraph well ~.~;

Monday, July 1, 2013

DIY Rockin' Penguin Sweets

A fun little DIY for kids. And im a big kid.
Make your own chocolates that penguins rock out to :P

This quirky korean cholocate kit contains buscuit 'stems', a strawberry and regular chocolate in tubes, a mold, and a rockin' penguins sticker sheet.
Very simply just squeeze out the chocolate into the molds, and stick a
buscuit into it for a handle.


It must be the chilly winter cold but the chocolate came out all stringy and didnt really 'fill' the molds nicely.
Even after squeezing out every last inch of the tubes, there wasnt quite enough chocolate to go around. I only managed to fill up 8 and a bit of the 10 piece mold.

                                                                           Lonely, unloved buscuit all by its lonesome!

Turned out abit ugly looking, not quite like the one pictured in the penguins flipper lol and the chocolate was tooooo sweet >.<;

                                                                                     This one grew a tail :X

And what should i do with the stickers...?


Monday, May 13, 2013

Stab, stab, stab

Browsing through Kinokuniya is quite a wallet depleting activity!
I always walk out wanting to purchase a few japanese crafty books and being in Aus., they can get quite pricey.
Amongst the japanese books was this little needle felting kit to make cute little doggy phone straps. What better way to try out a craft than getting started with a kit.
So, of course, i had to get one >.<;

The kit includes the wool fibres, eyes, jump rings and strap bits, instructions (in japanese), 2 felting needles, and a 'stab pad' <- a piece of foam. Enough to make 3 different dogs.

(Thats my completed doggie on the right... next to the image its supposed to look like)

Needle felting is quite the blood sport... or blood craft as it were.
The needles used have small serated teeth on them to better 'tangle' the wool fibers.
The project in question is to make a small item. Try holding on to the little bits of wool pieces and stab, stab, stab with very sharp long needles... its an emergency waiting to happen =P
Stab slow and it will take years to finish, stab fast and you might come out with missing some fingers =D

I made the middle dog featured in the photo of the kit.
Here is my completed piece.. it took 5 *full* hours and now i have arms like Popeye.
I dont know what sort of dog it is supposed to look like but mine turned out looking like a chihuahua with a smirk lol


This is a very fiddly (and tiring and dangerous) craft.
Those tiny legs and ears are a killer to do. Probably wasnt the best thing to make as a beginner =D
i dont know if i have it in my to make the other 2 dogs... =X
i have been put off for life (...if not, a very long time)

Saturday, April 27, 2013

Cream Quakers!

Quack quack quack!
I never seen these paper tole/3D decoupage things before until i saw them at a stall at the Sydney Stitches & Craft 2013 show.
The demo paper toles at the stall used mutli-purpose silicone sealant (the hardware kind!)between the layers o_O; that was very odd and messy to me, not to mention very uneven layers.

Anyhow, the paper toles are pre-printed sheets and pre-cut. Just pop them out of the sheet and start layering them. I used sticky foam dots in between.
This Cream Quakers set came with cards/envelopes to stick them on - this would fit in well with scrapbooking and more elaborate decorative displays.


Quick and easy craft. Little effort, quite enjoyable.


Wednesday, April 17, 2013

Crazy Cartonnage #2

I enjoyed making the first cartonnage box muchly.. although my hand needed a good rest from all the thick card cutting o_O;
I jumped right back in with a second project.

This time i wanted to make a flower pot bag.

I didnt have anything to follow off so i made up my own pattern. totally crazy!
I didnt have a giant compass either so my round bits were sorta free handed. even more crazy!
...lol yes, thats how confident i was >.<;

without further ado, presenting project #2

(excuse the background, just boxes of my other ♥ - designer shoes!)
I used the left over 'retro umbrella girls' fabric to line the interior. They are so cute!

Group shot!


Thursday, April 4, 2013

Trying my hand at Cartonnage

im a very crafty soul and i am always trying out new handicrafts. The problem i have is that i enjoy making things, however, i dont enjoy keeping things. Like plushies... what to do with them after that are complete? im not big on buying soft toys as i find them kinda useless, as cute as they are.

I stumbled across cartonnage: the age old french art of box making. Awesome. Something i could make and could be kinda useful at least :)

i was keen on looking up some cartonnage or fabric covered box information before trying my hand at it, however, sad to say, there was much on the net... other than recycling existing "packaging" or "postage" boxes and hastily covering it a giant sheet of fabric for "pretty" storage solutions; or the small handful of site/bogs found were in french or the boxes were very .... matronly and outdated.

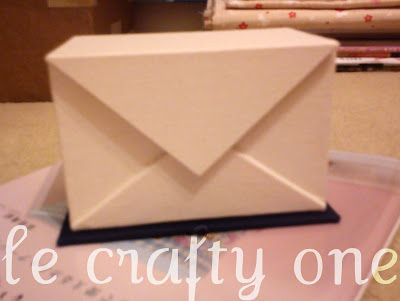
So without further ado, my very first cartonnage box!
It is a 'business card' box in the style of an envelope.


i referenced the japanese craft book that the box is sitting on... even though i can barely read japanese. You know what they say - a picture is worth a thousand words :)

I have always loved the Yve Saint Laurent "Y-mail" collection, so i borrowed that for front envelope design.
Call me crazy but i hand embroidered the design on... even though this was my first attempt at cartonnage, and the box could have turned out badly and with all that extra effort in hand stitching it, would have ended in tears o_O;


lift the lid and love the retro umbrella girls print! adorable!

Monday, March 11, 2013